Citroen DS seat cover replacement part 6
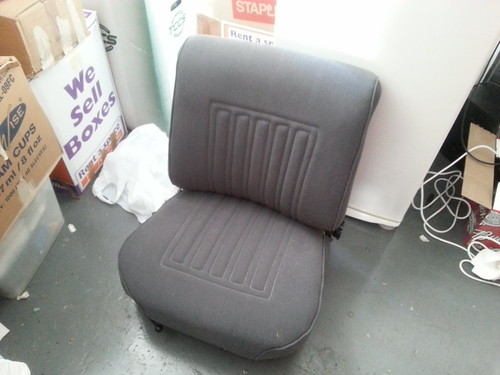
The passengers seat is now complete! In part 5, I was able to remove the old targa covers and get the seat down to foam. After a test fit of the covers, I felt they were too baggy, so I bought some additional foam from Clark Rubber. I went with the 25mm high density foam and bought four pieces. 2 61x52cm for the bases and 2 61x77cm for the backs. While the addition of this foam made it hard to get the covers on, it was worth it. I am much happier than the baggy appearance I had before.
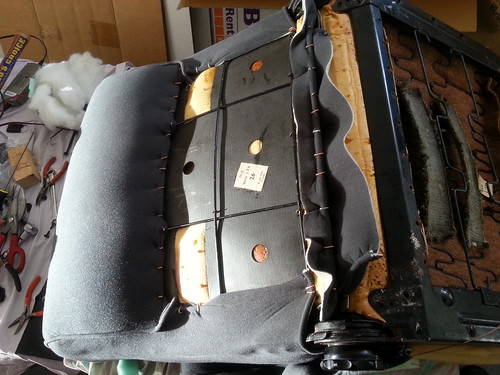 I started with the seat back. The foam I had purchased I also got to curl around the top, to make sure the top of the seat was well padded. The top of the seat was easier to fit than the bottom – It needed a bit of pulling with the additional foam. Once done, hog rings attached the cover to the frame in the same way as used on the rear seat. This is shown in the picture above. The hardest part was probably pulling the bottom around the back enough for a good fit, and making sure that the cover was straight.
For the seat bottom, I trimmed the foam a bit to fit the base, as it tapers a bit at the front and rear. The bottom mostly uses captive spurs to attach it. These are both at the front and the sides, and then hog rings for the rear. The seat cover has some wire running through the edge that you make sure is on the right side of the spurs so the cover cannot come off when somebody is sitting on it. There are also guides for the wire as it goes around the corners, although the wire kept coming out of those for me.
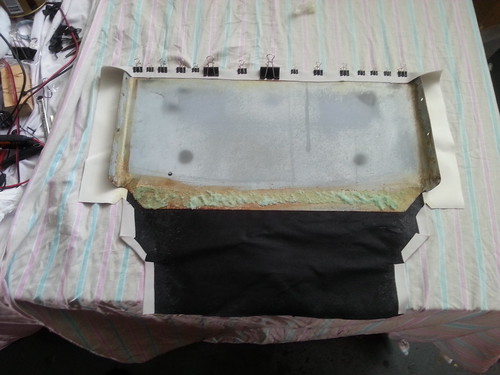
Once the covers were on, I could also re-attach the slider mechanism, after a quick clean. Next was to attach the backing and the headrest. The backing I glued on to the metal backing plate. I also used some tape to make sure it stayed on. You then screw the plate to the back of the seat with two screws on each side. With the seat cover on, it can be quite time consuming to locate the holes in the seat frame – and a lot of work to push this cover down enough so the holes line up. There are four holes in the seat – two for the backing, and two for the headrest. As this car is not a pallas, there is only one ashtray, which is on the other seat.
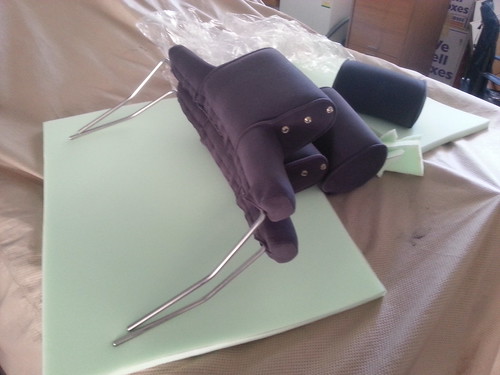
 The headrests are easy to assemble. There is a metal frame which goes inside the headrest cushion and is held on through velcro. There is then a neck rest that is held on to the main headrest with studs. The completed headrest then attaches to the seat through two sockets that screw into the side of the seat.
 Like screwing in the backing plate, it took a bit of fiddling to get the mounting point attached to the seat. Once done, the headrests just slide in. This is done so the headrests are easily removed. This is required if you want to fold the seats down into a bed, a feature of the DS.
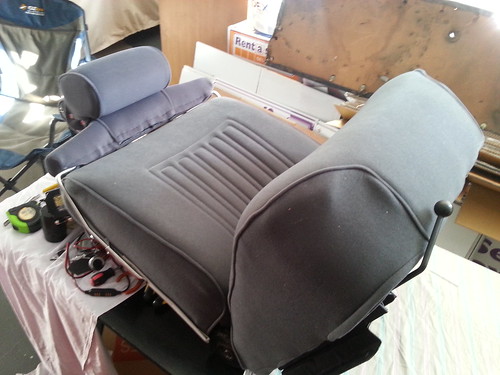 All that is left to do is fit this seat to the car, and repeat the process for the drivers seat. A quick test of the seat in the garage proves that it lives up to DS seat comfort! The Velour seats are far more comfortable than the Targa.







This is part 6 in a 8 part series.
Part 1:
https://www.classicjalopy.com/2013/11/citroen-ds-seat-cover-replacement-part-1/
Part 2:
https://www.classicjalopy.com/2013/11/citroen-ds-seat-cover-replacement-part-2/
Part 3:
https://www.classicjalopy.com/2013/11/citroen-ds-seat-cover-replacement-part-3/
Part 4:
https://www.classicjalopy.com/2013/12/citroen-ds-seat-cover-replacement-part-4/
Part 5:
https://www.classicjalopy.com/2014/01/citroen-ds-seat-cover-replacement-part-5/
Part 6:
(this page)
Part 7:
https://www.classicjalopy.com/2014/01/citroen-ds-seat-cover-replacement-part-7/
Part 8:
https://www.classicjalopy.com/2014/01/citroen-ds-seat-cover-replacement-part-8/