W126 battery tray
The W126 battery tray serves a dual purpose. The first and most obvious is to keep the battery in place. The other is to protect the body work. Over time car batteries can leak acid and the removable tray catches all that. It is worth checking the condition of the battery tray each time the battery is replaced. If the battery tray becomes too corroded then it can no longer protect the body work.
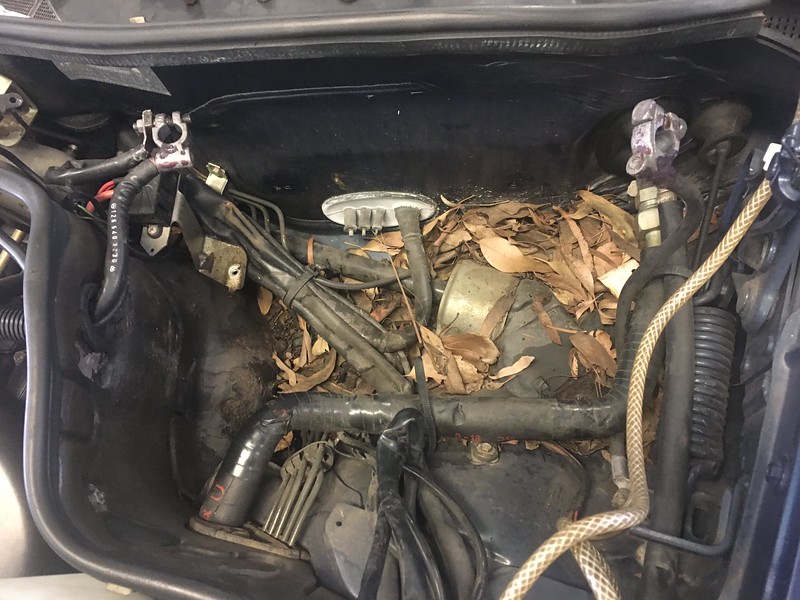
It is also worth checking the W126 battery tray for another reason. It is easy for leaves to accumulate under the battery tray. This can cause rust, especially on cars that park outside. The leaves never really dry out and rust starts to form. My 560SEL is in excellent condition and has been garaged all its life. It still had a fairly nasty battery tray with a lot of leaves stuck underneath it.
The W126 battery tray was worse than the one I fixed on my 450SLC. As the bolts were a bit rusty I soaked then in penetrating oil. The tray is held on with four bolts and a nut. Two that attach to the firewall, a big one on the bottom left that is obscured by the wiring loom and a smaller one at the top left that doens’t actually hold the tray on, it attaches a bracket for a power distribution block. The nut would be visible on the bottom right but is obscured by leaves.
Normally there is a bracket that holds the battery to the tray. This was missing on my car so I have ordered a new one. There are two nuts that hold this bracket to the tray. These can be seen in the next photo after I removed the leaves and applied the penetrating oil.
After the use of the penetrating fluid the bolts and nut removed fairly easily. I was then confronted with a massive volume of leaves and debris. After vacuuming them away, I also found an EHA o-ring and a washer, I guess they had been dropped there over the years. I find a vacuum cleaner is ideal to remove this debris – even a household unit is fine – I am using my grandmothers old 80’s electrolux in the garage and its fine. This vacuum cleaner pre-dates the car.
I was pretty lucky. Despite all that debris, there was no rust apparent on the body work. This is likely because the car has been garaged all its life. I don’t think a car parked outside would fare very well as the leaves would never dry out properly. The only area I had to treat was the captive bolt that helps attach the battery tray. There was a very slight amount of rust at the base of this bolt that I treated and painted.
overall the area looked very good once the debris was removed. The big bracket that can be seen in the photo holds the sway bar bushing on.
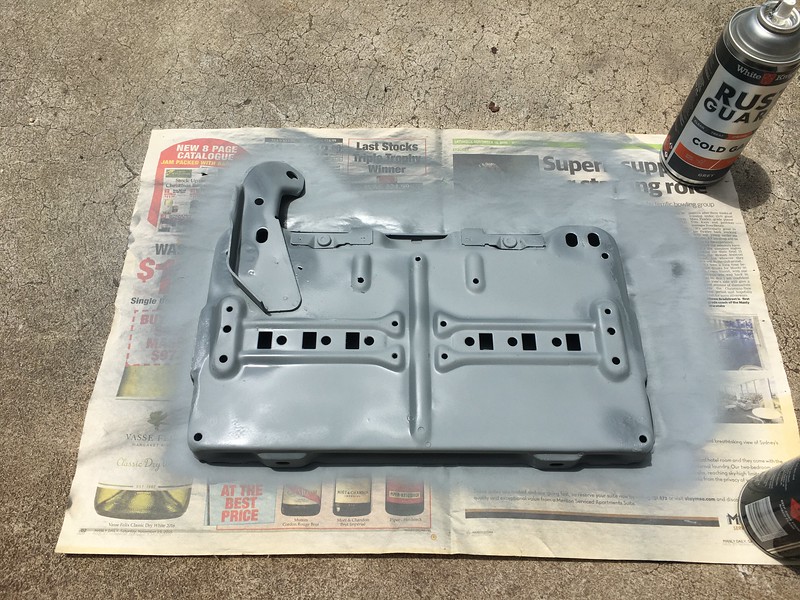
Once the area had been cleaned I started work on the tray itself. As with the 450SLC, I used a wire brush attachment for my drill to remove as much of the rust as possible. In one area of the tray it was quite corroded. The photo below shows the tray with the rust removed. Unfortunately I forgot to take a photo before starting to spray the primer so there is a little primer there. The side shown was worse, but there was also rust on the underside, in particular where the attachment tongue joins the tray.
I used a separate primer on the W126 battery tray before the paint. Probably if I wanted an even better finish I would have the tray powder coated. This isn’t something I can do myself.
After priming, I applied two top coats. I think both of my coats were too heavy as the paint ended up a bit soft. I made this same mistake when I did the 450SLC tray as well. Something to work on next time I restore a battery tray. I’ve not inspected the trays on my 300SE or 560SEC, and they’ll probably need doing too. The photo below shows the freshly painted tray and the corroded areas are quite apparent.
 Once I finished, installed the battery tray and the new battery I purchased a couple of months ago. The old one was working, but it failed the battery test. I didn’t want to be left stranded with a bad battery.


2 Responses
[…] W126 battery tray […]
[…] I restored the battery tray on my 560SEL, I noticed the W126 battery hold downs were missing. While the battery on the W126 […]