W116 280SE drag link and tie rod ends
My next job on the 280SE project was replacing the drag link and tie rod ends. Of the six ball joins in the steering, two were really bad, and the others were all quite old. In addition, I planned to replace the idler arm while I was there. The rubber was old and cracking so it was definitely due for it. I already had the worn steering coupling replaced, so this should renew the steering feel as much as possible.
For this job, I went with Lemforder parts. They are a lot cheaper than genuine and I have had very good experience with them. It’s not worth saving a couple of dollars and going with the budget brands like Uro. Unless the actual tie rod is damaged, there is no point buying the entire assembly. The ends are much cheaper and the centre section will only be a problem if its bent because it’s hit something.
I started with the drag link. I had assumed I would also need to replace the steering shock, but surprisingly it was in good shape. The drivers side joint on the drag link was the worst on the car. These parts used to come with a castellated nut and split pin at each end, but the modern replacements use a nylock nut instead. On this car, only one of the joints was the modern type, the rest were all the older style. I’m not sure when the change happened on the W116 280SE drag link, but I don’t think this car got much use in recent years.
You see people on youtube using a hammer to break the ball joints free, either directly or with a pickle fork. I’m sure that can work, but the simplest way is to use the ball joint separator tool. I bought a cheap one years ago when working on my old 280CE. It makes getting these joints off very simple. The only gotcha is that when they go, they go all of a sudden and violently. I used a long handled ratchet so I could stand as far away as possible.
 Once I had done the drag link, next was the idler arm. I don’t think it really matters what order you actually do these. You could probably even take everything off first then put it all back on. However, my hoist blocks all the other cars parked behind it, so I wanted to do each job discretely so I could take the car down and move it.
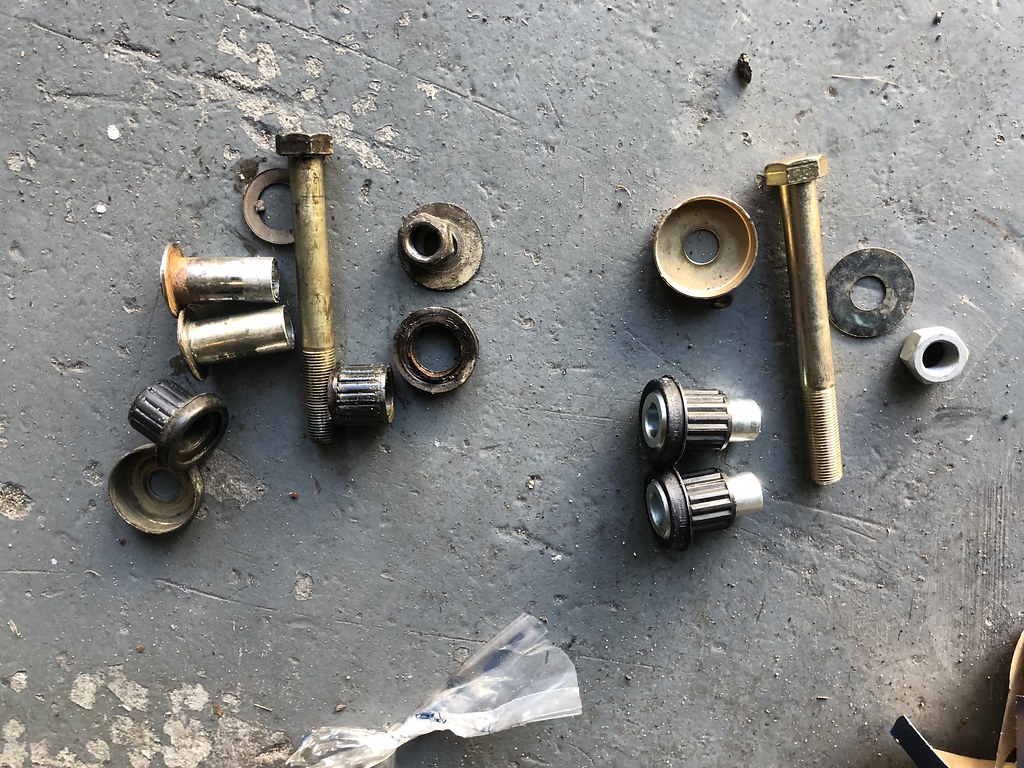
The hardest part is getting the old bushings out. The bolt, nut and washer come out easily. I found the easiest was to use an old flathead screwdriver to push out the top bushing first. I needed to use a hammer to get it to move. This broke in half for me, so I had to remove both bits. Once the bushing is started and there is room between the two halves, the old bolt is also useful here.
With the top one out, I found the old bolt upside down, the easiest way to get the bottom one out. The old idler arm was worse than it looked to start with. I also used the old bolt to get the new bushings in. That way I wasn’t putting pressure on the threads of the new bolt to pull in the new bushings.
Once that was done, I started on the drivers tie rods. The drivers side was worst, so I figured I might as well start there. Again, using the ball joint separator tool, the old tie rod was out easily. On this side, the ends were also easy to remove, I was able to unscrew them by hand once I had loosened the locking nut. One of the ends is reverse threaded, so when doing an alignment the length can be adjusted without removing the tie rod. I was going to get the car aligned after this, so I roughly measured the length of the overall tie rod and from the centre section to each end. You can also count the turns if you’re confident the threads are the same length on the new and old parts.
I wasn’t too concerned with getting it exactly right as I planned to have the car aligned anyway. The passengers one was a bit harder – the ends were so stiff I could not turn them by hand. In the end I put the ball joint end back onto the car and used a vice grip to hold the centre piece. This allows me to twist it enough to swap both ends.
At this point I had the car back together and the steering good enough to drive safely to a tyre place for an alignment. I’m glad I did as the caster and camber were off. They were able to get the car aligned for me and it drives much better. Next is exhaust repairs.


2 Responses
[…] W116 280SE drag link and tie rod ends […]
[…] this year: Getting the car running well. Fuel pressure testing, drag link and tie rod ends, exhaust, seat repair, stuck ignition […]