Hero Hoists Side by Side Parker Installation Part 4
The Hero Hoists Side by Side Parker is now installed and fully operational. The locking mechanism is now working, and I have put the E-Type on top. In the last part, I had the electrical connection hooked up and did the final adjustment.
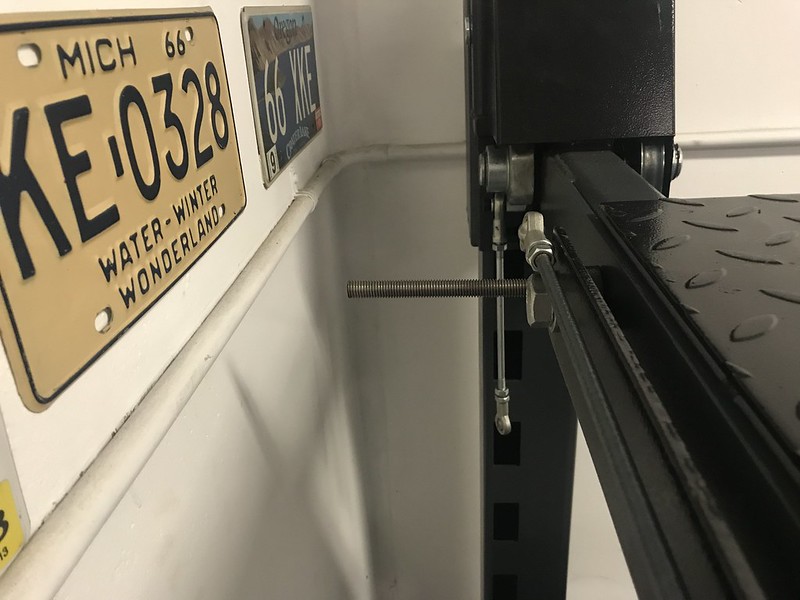
The challenge I had with the locking mechanism was that a 1M rod needed to be installed from the rear of the hoist. I did not have this much clearance. To solve the issue, I cut the T-piece off the rod with an angle grinder and drilled out the bit of rod left in the hole. I then purchased an M12x1.75 threaded rod from Bunnings warehouse and was able to get that rod into the hoist from the underside. I then used nuts and washers to affix the T-piece back on the threaded rod.
This worked fairly well and the locks are now functioning as they should. This hoist has two sets of locks and they look quite robust.
I also wanted to make a minor adjustment to the placement of the hoist. This is no problem as it comes with a castor kit. It was a pretty simple matter to install it and move the hoist about 200mm. I was able to do this on my own.
The hoist is a tight fit for me, but worth it to get two more cars into my warehouse. As outlined in the last part, I need to investigate adjusting the drop ceiling to gain an extra 100-120mm. This will provide more flexibility for the upper cars. Unfortunately this is probably not going to be enough height to use the 9th lock position. Using the 9th would have allowed the Traction to be stored underneath. The final configuration will probably be E-Type and SLC on top and DS/560SEC down below.
In the future, I may investigate an LED kit for the underside of the ramps. I may also look at getting some wooden inserts to fully protect from drips. Hero Hoists offer an aluminum insert kit, but its quite pricy. It also covers the middle of the hoist between the ramps. This wouldn’t apply in my case as I have shifted the second set of ramps to the right.


3 Responses
[…] Hero Hoists Side by Side Parker Installation Part 4 […]
[…] installed a double four post hoist late last year. Overall, I have been happy with the hoist. It is a very tight fit in my […]
[…] is almost a year since I installed the Hero Hoists side by side parker. overall, I have been very happy with this hoist. It […]